Set up the booking widget
Write what your visitor widget says, style its look, and install it on your website.
The Widget page covers content, opening behavior and installation for the chat widget guests see on your website. Appearance, color and type live on a separate screen called Widget Studio.
Open Widget
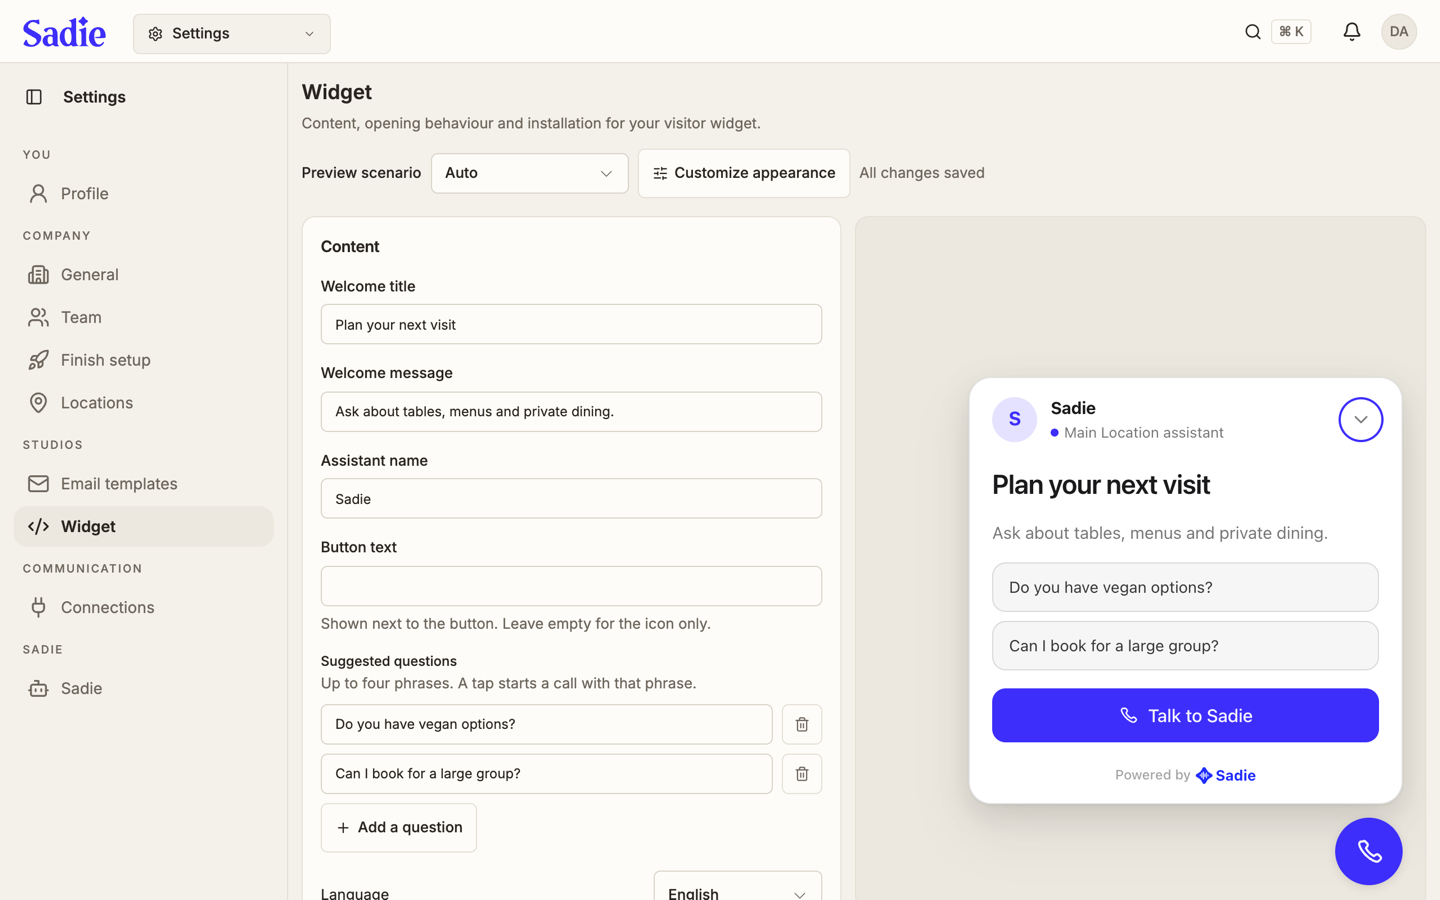
Click Settings in the top bar, then click Widget under Studios in the sidebar. A live preview of the widget sits on the right.
Write the welcome content
Set the Welcome title and Welcome message shown when the widget opens, and the Assistant name. Button text sits next to the launcher button; leave it empty to show only the icon.
Add suggested questions
Click Add a question to offer up to four phrases guests can start a conversation with. Click the trash icon next to a question to remove it.
Set the language
Choose the widget's language from the Language field, or leave it on Auto to follow the visitor's browser (English when their language is not supported). This is the language the widget's own text appears in, separate from your own portal language.
Style the widget
Click Customize appearance to open Widget Studio. Simple offers a Preset and an Accent color; Advanced adds full control over type, corners, button style, logo frame and motion. Changes preview live on the right; click Apply appearance to publish them, or Discard to drop them. Leaving Widget Studio with unpublished changes asks first, so nothing is lost by accident.
Language and opening
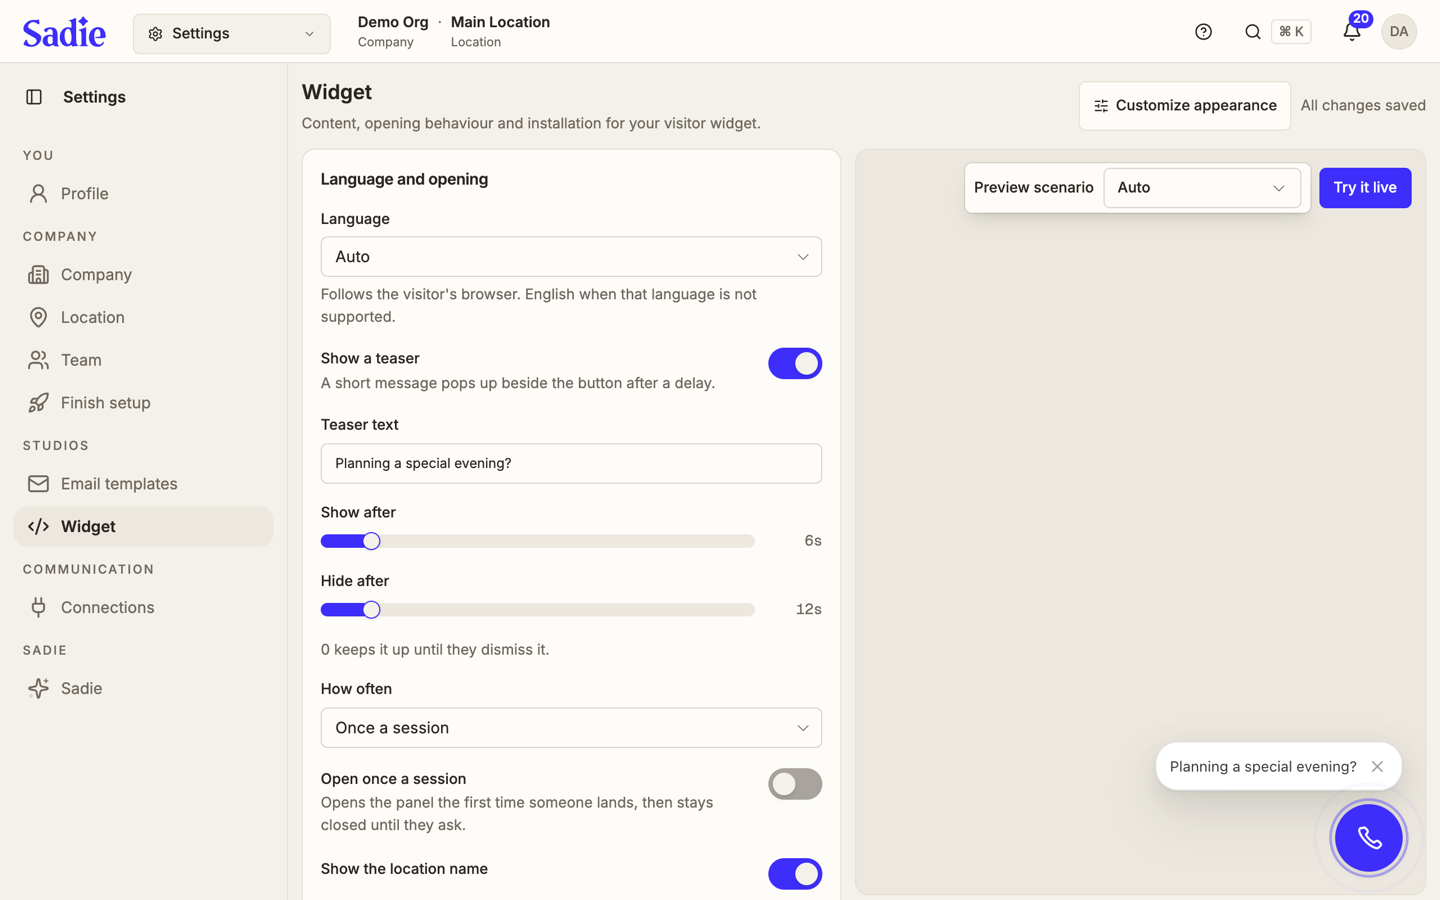
Under Language and opening, Show a teaser pops a short message beside the button after a delay you set with Show after, Hide after, and How often (Every visit, Once a session, or Once only). Open once a session opens the panel itself the first time someone lands, then leaves it closed until they ask. Teaser and auto-open only apply when Deploy mode is Floating; their values are kept if you switch away.
Try it live
Click Try it live to open the widget in the same state a visitor would see, inside the preview. Click Back to preview to return to editing.
Go live
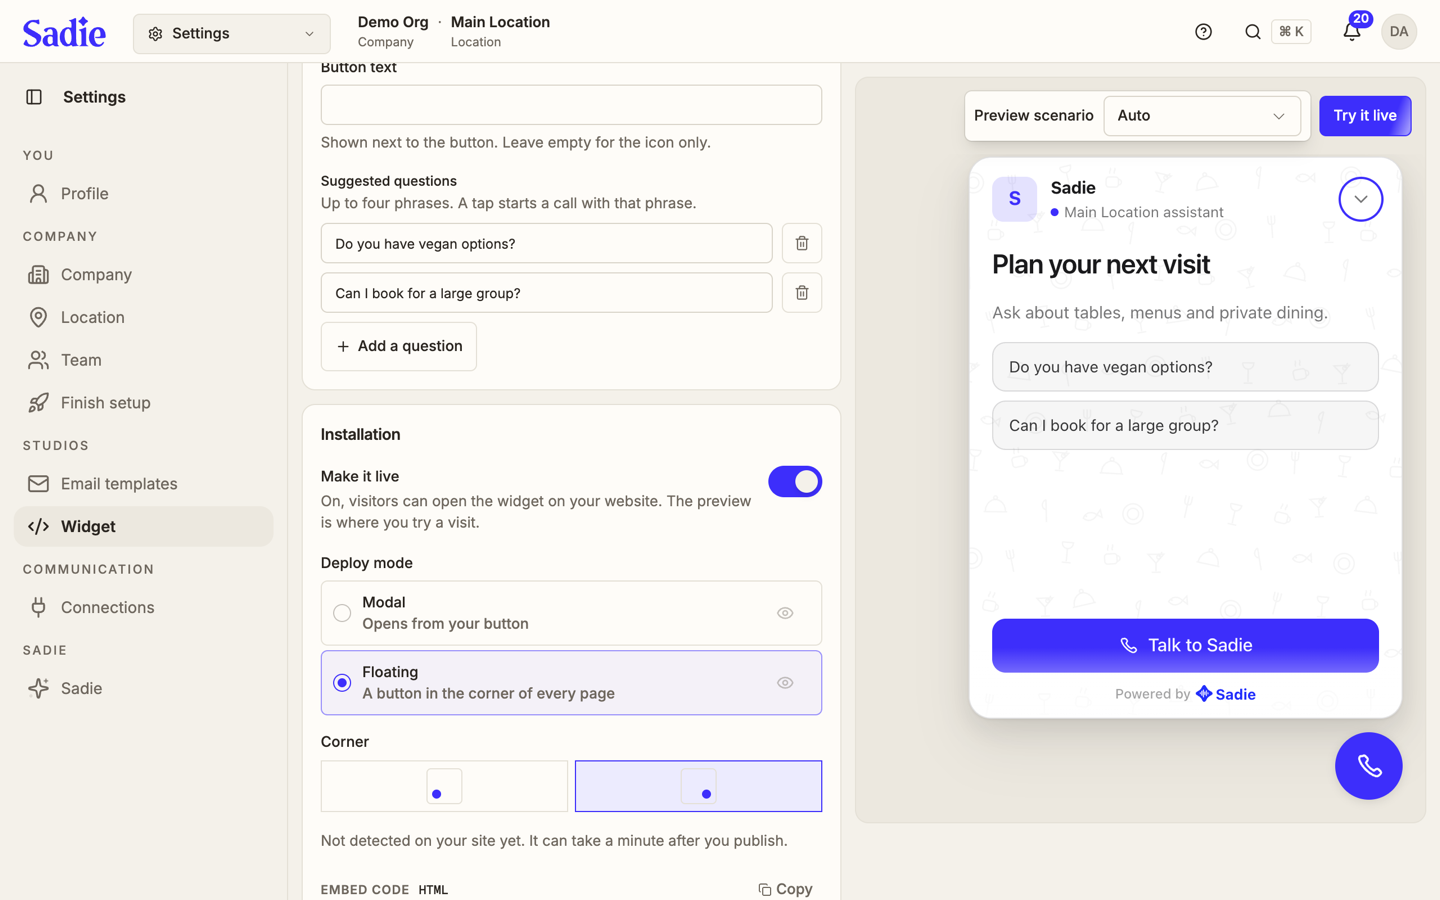
Make it live controls whether visitors can open the widget on your website at all. While it is off, the preview is where you try a visit; nothing is public yet. In the same Installation card, Deploy mode sets whether the widget is Floating (a button in the corner of every page) or embedded another way, and Corner picks which corner the floating button sits in when Deploy mode is Floating.
Under Allowed sites, add the address of every site that carries the snippet. The widget itself can still appear anywhere the snippet is pasted; Allowed sites instead controls whether a visitor on that site can send a booking request or start a call with Sadie. Removing the last allowed site stops the widget taking bookings and calls on your websites until you add one back.

Install the widget on your site
The Installation card gives you a snippet of code. Click Copy to copy it, then paste it into your website's HTML. Once your site loads it, the card shows the widget was detected on that address.
What's next
Widget content and installation are set. Connect the tools your workspace runs on next, on Connect your other tools.