Edit your email templates
Brand and edit the account and workspace emails your organization sends.
Before you start
Email Studio needs an active location. If your organization has none yet, create one first.
Email Studio renders every recipient email from one shared brand kit, so a color or logo change here updates every template at once. A live preview sits beside your edits the whole time.
Open Email Studio
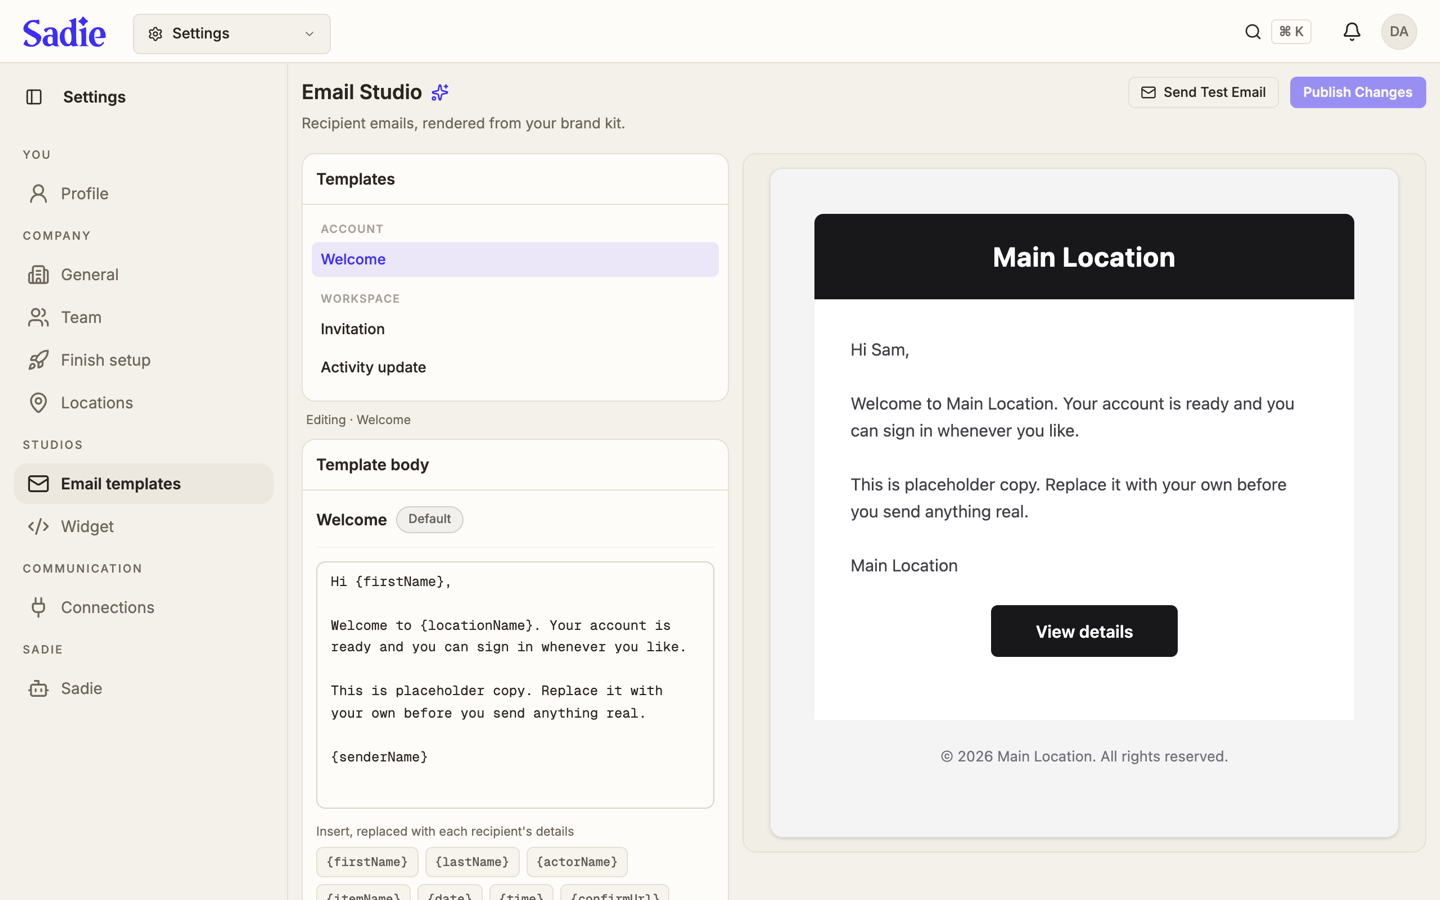
Click Settings in the top bar, then click Email templates under Studios in the sidebar. Templates is split into Account (Welcome) and Workspace (Invitation, Activity update).
Pick a template
Click a template name in the list, for example Welcome. The Template body editor and the preview on the right both switch to it.
Edit the design
Set your Title, Subtitle and Logo, then the Header Background, Button Color and Text Color. The preview updates as you type. Cover image and Footer Text are optional.
Edit the wording
Type your own copy into Template body. Click one of the pills below it, like
{firstName} or {locationName}, to insert that placeholder; the app fills
it in with the real value when the email sends. Click Save to keep your
changes for this template only, or Reset to default to drop them.
Send a test, then publish
Click Send Test Email to receive a copy at your own inbox before anyone else sees it. Click Publish Changes to apply your brand kit changes across every template.
What's next
With your emails branded, set up the booking widget on Set up the booking widget.